Image to Relief STL
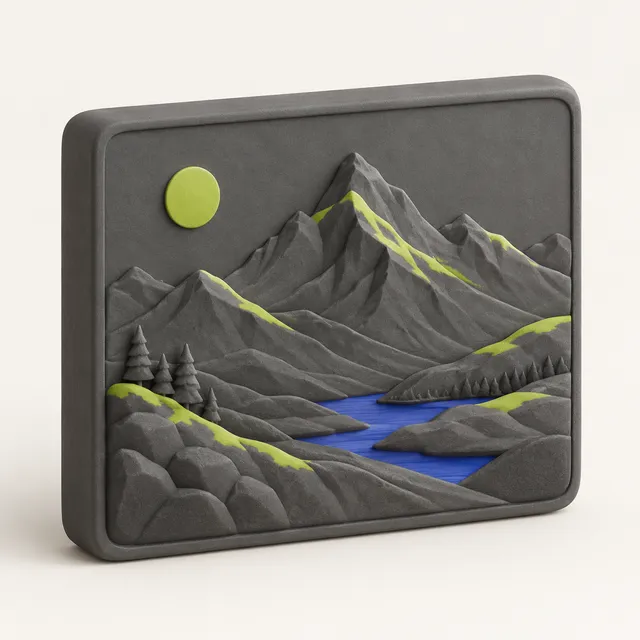
Drop a photo, logo or drawing and get a bas-relief you can print, mill or hang on a wall: a closed solid with a flat back, sized in millimetres.
To turn an image into a relief for free, drop it on MeshShift: brightness becomes height on a solid plate with a flat back, at the width you type in mm, with depth, invert and smoothing controls. It runs in your browser with no upload or sign-up and exports an STL for any printer or CNC.
In short: To turn an image into a relief, drop it on the tool above: MeshShift reads brightness as height, so light areas rise and dark areas sink (or the reverse with Invert), and builds a closed solid with a flat base you can print straight away.
Set the width in millimetres, the relief depth (2 to 4 mm suits most prints) and the base thickness, then smooth the surface if the photo is noisy. The preview shows the real size and you can download an STL for free, with no sign-up and no upload, because the whole conversion runs in your browser. Reliefs work best for portraits with soft light, logos, coins, plaques, signs and kids' drawings. If you want a full 3D figure you can walk around rather than a raised picture, the AI photo-to-3D tool on MeshShift builds one from the same image.
How to use the Image to Relief STL tool
- Drop a photo, logo or drawing on the tool.
- Choose relief mode and set the width in mm.
- Adjust depth, base and smoothing, or invert light and dark.
- Download the STL and slice it face up.
| Relief | Lithophane | Full 3D model | |
|---|---|---|---|
| How you see it | Light across raised surface | Light shining through | From every side |
| Material | Any filament or resin | White filament, thin | Any |
| Best for | Plaques, signs, coins, moulds, CNC | Lamps, window panels | Figures, busts, toys |
| On MeshShift | Free, in browser | Free, in browser | AI, 1 free model a day |
Relief vs lithophane vs full 3D model
All three start from a flat picture, but they print very differently.
- Relief (bas-relief): the picture becomes raised height on a solid plate. You see it by the light falling across it, like a coin or a carved plaque. It is opaque and works in any filament or resin.
- Lithophane: the picture becomes thickness in a thin panel. It only shows when light shines through it, so it needs white filament and a lamp or window.
- Full 3D model: the subject is rebuilt in the round, with a back and sides. That needs AI, because a single photo has no information about the hidden side.
Pick a relief for wall art, signs, coins, medals, cake and soap moulds, or a CNC carving.
Which images make good reliefs
A relief maps brightness to height, so the best images have clear light-to-dark separation in the parts you care about.
- Logos and line art: crisp edges give clean raised shapes. Use Invert if the logo is dark on a light background and you want it raised.
- Portraits: soft, even light from one side. Hard shadows turn into deep holes.
- Landscapes and textures: wood grain, stone and maps make good wall tiles.
- Heightmaps and depth maps: already encode height, so the result matches the original exactly.
Avoid busy backgrounds; crop or remove them before you drop the image. A relief 100 to 150 mm wide shows most detail on an FDM printer with a 0.4 mm nozzle.
Settings that matter
- Width: sets the final size; height follows the image's aspect ratio.
- Depth: the difference between the lowest and highest point. 2 mm is subtle, 4 mm is bold; more than 6 mm makes steep walls that print poorly.
- Base: 1.5 to 2 mm keeps the plate flat and stiff. Add a border if you want a frame.
- Smoothing: removes JPEG noise and grain so the surface is not rough.
- Invert: swaps which areas rise. Faces usually look more natural with light areas raised.
Print face up with a 0.12 to 0.16 mm layer height for the smoothest surface, or on a resin printer for fine detail.
From relief to mould, CNC or sign
The STL is a normal closed solid, so you can use it anywhere a 3D file is accepted. Mirror it in the free STL editor before printing a cookie stamp or soap mould so the design reads the right way round. For CNC carving, import the STL into your CAM software as a 3D surface and run a finishing pass with a ball-end mill. For a door sign, combine the relief with raised text from the 3D text generator in your slicer. If you need the exact outline for laser cutting instead, the image to DXF tool exports closed vector paths.
Frequently asked questions
Is the image to relief converter free?
Yes. Relief, lithophane, stamp and cookie cutter modes are free with no sign-up, no watermark and no limit on files. The image is processed in your browser and never uploaded, so private photos stay on your device.
What file do I get?
An STL in millimetres: one closed, watertight solid with a flat back that opens in Cura, PrusaSlicer, OrcaSlicer, Bambu Studio and CAM software. You can convert it to 3MF, OBJ or STEP with the free MeshShift converter.
Why does my relief look noisy or spiky?
Photos carry JPEG noise and fine texture that turn into tiny bumps. Raise smoothing, lower the depth a little, or use a higher-resolution image with a plain background. Very dark areas also become deep pits; brighten the photo first if needed.
Can I make a 3D model of a person instead of a flat relief?
Yes, but that needs AI because one photo does not show the back of the head. The MeshShift photo to 3D model tool builds a full figure or bust from one photo; the first model each day is free to generate, preview and download as STL/3MF without an account.